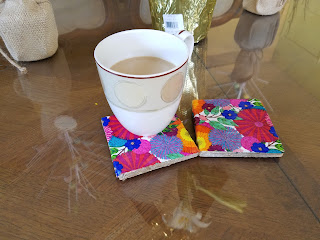
Coloring Book Coasters
Leisure Arts was generous and gave me some lovely Adult coloring books to try the new coloring craze!
 After spending so much time on one page to make it look beautiful it seemed like such a waste to have it sit in a book.
I came up with at great DIY for an age that is fun and unique.
First you need a completed coloring page. I recommend the Leisure Arts ones because they are not double sided and they are thick so they will not rip during this process.
Scissors to cut the paper.
You will also need Mod Podge, I used the luster one to give it a high gloss finish, play around and see which one you like best.
Tiles from the hardware store are the last item. I found the cheapest ones in the bathroom and kitchen section. I picked up 8 for about $5.65. You can use which ever ones look good to you or fit your budget. Remember we will cover the top with our art work.
Step 1
Trace the outline of your coaster on the back of your coloring page and then ty cut them out giving a little more space than the line.
Step 2
Place a layer of MP on your tiles and wait about 1 minute before putting your coloring page on design side up. Then place a smooth layer of MP on the top of your picture. Using your finger smooth the edge so that the little extra folds down.
Step 3
Wait at least 20 minutes or until it's tacky and then place another coat. Repeat this step 2 more times for a total 4 coats.
Step 4
Admire your new coasters! It's best to make sure they are completely dry and no longer tacky before using. Also adding a piece of felt to the bottom will protect your wooden furniture from scratches. To add felt. First trace the coaster, then cut slightly inside the line so the felt is slightly smaller. Then add MP to the bottom of your coaster. Wait 1 minute then place the felt under your coaster, let dry and it is read to use!


Comments
Post a Comment